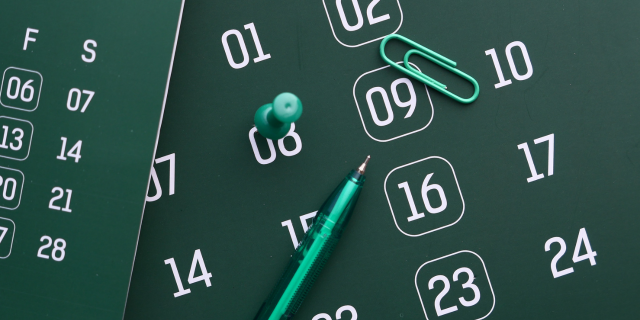
A Step-by-Step Guide to Setting Up Your Wall Planner
In today’s fast-paced world, staying organized is essential to managing both personal and professional tasks effectively. One of the most efficient ways to boost productivity and time management is by using a wall planner. A wall planner allows you to see your schedule and goals at a glance, helping you stay on track and reduce stress. However, simply purchasing a wall planner isn’t enough—you need to know how to set it up in a way that works best for your unique needs.
In this guide, we’ll walk you through the steps of setting up your wall planner, ensuring that it becomes a powerful tool for organizing your life and maximizing your time.
1. Choose the Right Type of Wall Planner
The first step in setting up your wall planner is selecting the type that best suits your needs. There are several formats available, and the one you choose should align with how you plan to organize your tasks.
- Monthly Wall Planners: Ideal for those who need an overview of the entire month. It’s perfect for planning appointments, events, and major deadlines.
- Weekly Wall Planners: A great choice for those who prefer to plan on a weekly basis. This format breaks down your tasks by day and gives you a clear view of your week ahead.
- Daily Wall Planners: If you need to focus on detailed day-to-day planning, a daily planner might be the best option. This type of wall planner provides space for hourly schedules, to-do lists, and specific notes.
- Magnetic or Dry-Erase Wall Planners: These planners offer flexibility since you can easily update your schedule. A dry-erase board is a great option for people who want to make constant adjustments.
Select a wall planner that fits your preferred style and planning needs. Whether you need a high-level view or a detailed daily breakdown, there’s a planner out there that works for you.
2. Select the Right Location for Your Wall Planner
Once you have your wall planner, the next step is to find the ideal location for it. Choose a space in your home or office that is frequently accessed by everyone who needs to use it. It should be in a spot that is easily visible, so you’re constantly reminded of your tasks and deadlines.
Some ideal locations for your wall planner include:
- The kitchen or dining area (a common area that everyone passes by).
- Your home office or workspace (if you work from home).
- A hallway or entryway (so it’s visible as you walk in and out).
- A shared family space where everyone in your household can contribute to and check the planner.
The key is to make sure the location is visible and easily accessible, so the wall planner becomes a regular part of your daily routine.
3. Gather Supplies and Materials
Before setting up your wall planner, gather the necessary supplies. Depending on the type of planner you chose, you may need different materials. Here’s a general list of what you might need:
- Markers or pens (for writing on your planner).
- Stickers or color-coded labels (to help categorize different tasks or events).
- Magnets (for magnetic planners).
- Dry-erase markers (for dry-erase planners).
- Post-it notes (for last-minute additions or changes).
- Ruler or straight edge (if your planner requires drawing lines or sections).
- Tacks or adhesive strips (if you need to hang your planner on the wall).
Having everything prepared ahead of time will make the setup process smoother and faster.
4. Set Up Your Planner for Maximum Effectiveness
Now that you have your planner and supplies ready, it’s time to set it up. Start by breaking down your wall planner into sections that work best for your needs. The following steps outline how to create a structure that will help you stay organized.
a. Title Sections Clearly
If your wall planner covers multiple areas (e.g., daily, weekly, and monthly views), make sure each section is clearly labeled. For example:
- For a monthly planner: Mark each box with the month and the specific days of the week.
- For a weekly planner: Clearly label the days of the week, and leave room for each day’s tasks.
- For a daily planner: Include specific time slots, so you can plan your day hour by hour.
Proper labeling helps ensure that you can easily find the information you need without confusion.
b. Prioritize Tasks
One of the benefits of a wall planner is that it helps you prioritize tasks. As you fill in your planner, ensure that the most urgent tasks are clearly marked. You can use color-coded markers or symbols (like a star or an exclamation mark) to identify high-priority tasks.
This makes it easier to see at a glance what needs to be done first, helping you stay focused on what’s most important.
c. Leave Space for Flexibility
Life is unpredictable, and things can change at the last minute. It’s important to leave room for flexibility on your wall planner. Whether you use sticky notes for quick additions or leave extra space for adjustments, make sure you can accommodate last-minute tasks and changes.
Consider using sections like "To Be Added" or "Changes" where you can jot down new tasks or rearrange your schedule. This will allow you to keep your planner dynamic and adaptable.
d. Include Personal and Family Sections
If the wall planner is being used for the whole family, create individual sections for each member. Use different colors to represent each person’s activities. For example:
- Blue for work-related tasks.
- Green for school and extracurricular activities.
- Yellow for personal tasks and appointments.
This makes it easier for everyone to see what they need to focus on, and helps with family coordination.
e. Set Up Goals or Habit Tracking
For those looking to track progress on long-term goals or personal habits, dedicate a small section of your wall planner to goal setting or habit tracking. Whether you want to track exercise, water intake, or progress on a big project, having a visible reminder can motivate you to stay on track.
5. Start Filling in Your Planner
Once the structure is set up, it’s time to start filling in your wall planner with the information that needs to be tracked. Begin by adding important dates, appointments, deadlines, and recurring events.
For a monthly wall planner, write down any major events like birthdays, work deadlines, or school vacations. In a weekly planner, add specific daily tasks such as meetings, appointments, or even personal to-dos like grocery shopping or laundry.
As the week progresses, update your planner as new events arise or tasks are completed. This ensures that your planner is always up to date and reflects your current schedule.
6. Review and Adjust Regularly
To ensure your wall planner stays effective, review it regularly. At the end of each week, take time to assess your progress and adjust as necessary. Make sure to check for any upcoming events or tasks for the following week.
This routine will help you stay on top of your schedule and prevent you from falling behind.
Conclusion
Setting up your wall planner can be a game-changer when it comes to staying organized and managing your time effectively. By following these step-by-step instructions, you can create a personalized planning system that fits your needs and helps you stay on top of your tasks. Whether for personal use, family coordination, or work organization, a wall planner provides a clear, visual approach to managing your time and achieving your goals. With consistent use and regular adjustments, your wall planner will become an indispensable tool for staying organized and focused in every area of your life.
Web:- https://justcalendars.com.au/collections/wall-planner
#WallCalendars, #WallPlanner, #FamilyCalendar